Friday, November 27, 2009

Vellum Window Pocket with Insert

I am such a fan of Maria's blog: Stampin Inspirations by Maria. This is such a talented woman, that it is unbelievable the crafts that puts out! You can always count on seeing and being inspired by the beautiful crafts she has made.

This envelope pocket has a little window of which could be acetate or vellum. I chose vellum as it is something I don't often use. I stamped one and embossed it, which came out kind of cute. The rest I left plain.

I did two more and am pleased with how they came out. The insert can be decorated with a lot of fluff or just simple die-cuts like I did. It's so easy - you'll have fun doing this little goody.

I'm happy to see we've gained another follower. :p Welcome! Please feel free to take our blinkie and put on your blog to share with others. Happy Crafting!

Thursday, November 26, 2009

Another Bag

Greetings everyone,

I know you miss Jacqui - so do I! :p But she's in the UK - unpacking and all that fun stuff!

I have another bag for you that I found through a blog. This bag is so cute and only needs one sheet of paper - 81/2 x 11 (how cool is that?). I would recommend using a light card stock, not that heavy kind from specialty papers, as it will be difficult for that little pinch on the side. Click here for the step-by-step tutorial.

These make great gifts for that little bag of candy you want to give some one. I'm going to make a bunch of these to give as little gifts to my DT for the holidays (and some other goodies) because they've been so good to me, helping me promote Tellen's Place. It's just a nice thank you to them for spending their time and blog space, making beautiful crafts and all that; you really know it is a blessing. I think this little goodie is an inexpensive but crafty way to let them know I care about them! :)

Hope you are having a wonderful day and for those in the US - Happy Thanksgiving!! Gobble, gobble!! :)

Tuesday, November 24, 2009

Bag Ladies...

I'm a lover of bags, no matter what kind and when I saw Patti's (Cherish Each Precious Day blog) cute little pink gingham bag, I knew I had to make one. Her link takes you to another link which takes you to the link with instructions - click here (Jenn Diercks gives the step by step guidelines).

I actually took a class and made this bag - a little differently. A club I belong to that raises money for scholarships to help the under privileged saw the bags and wanted them as a gift for each member at the holiday party last year. I made 75 of these babies - complete with clip cart they picked that became a die-cut from card stock. All of the recipients loved it. That one had a better bottom fold to help it remain standing. I even made cute little thank you cards that fit well inside and they added a small ornament (yes, our bag was a little shorter and wider). It was fun.

Another gift idea for the holidays. Are you a follower yet? Good - now you can tell a friend so grab our blinkie and let people know of these fantastic short-cuts and freebies.

Monday, November 23, 2009

A Frosty Mug...

Happy Monday!

The weekend is over and if you are still pondering what to do about Christmas, here's an idea for you that Jacqui has over at Crafty Cardz. Yes, it's a free mug!

As you can see, you, this mug can be printed on patterned cardstock, which means you'd only need adhere die-cuts; no coloring, just a bit of a bow and a die-cut and you're done. How easy is that?

I cut the pattern on the fold so that it would open like a card. This was double sided designer paper, which works perfectly. I added plain paper for writing as such and added another die-cut ornament.

This freebie can add to the typical square card, so why not head over to the Crafty Cardz and get the pattern. You'll be happy you did. While you're at it, take our blinkie and add it to your blog so people can learn more about us. Better yet, become a follower yourself and let others know - it's a fab place especially for short cuts and tips on so many things, especially free stuff! :)

Sunday, November 22, 2009

Gift Giving...

Although Thanksgiving for the U.S. is next week, many of us are putting together Christmas gifts, trying to get a head start before the mad rush and last minute pick-me-ups.

You Tube has many tutorials on quick gift ideas and I found one that is quite popular in the blogging craft community: The envelope mini album. There are so many but I'm not one to work on a project days on end. I want to see the results fairly soon.

This mini album tutorial can be found here.
The envelopes are a good size and make a small enough mini album that can be taken to friends' or family members' houses to show off - a little quick brag book, so to speak.
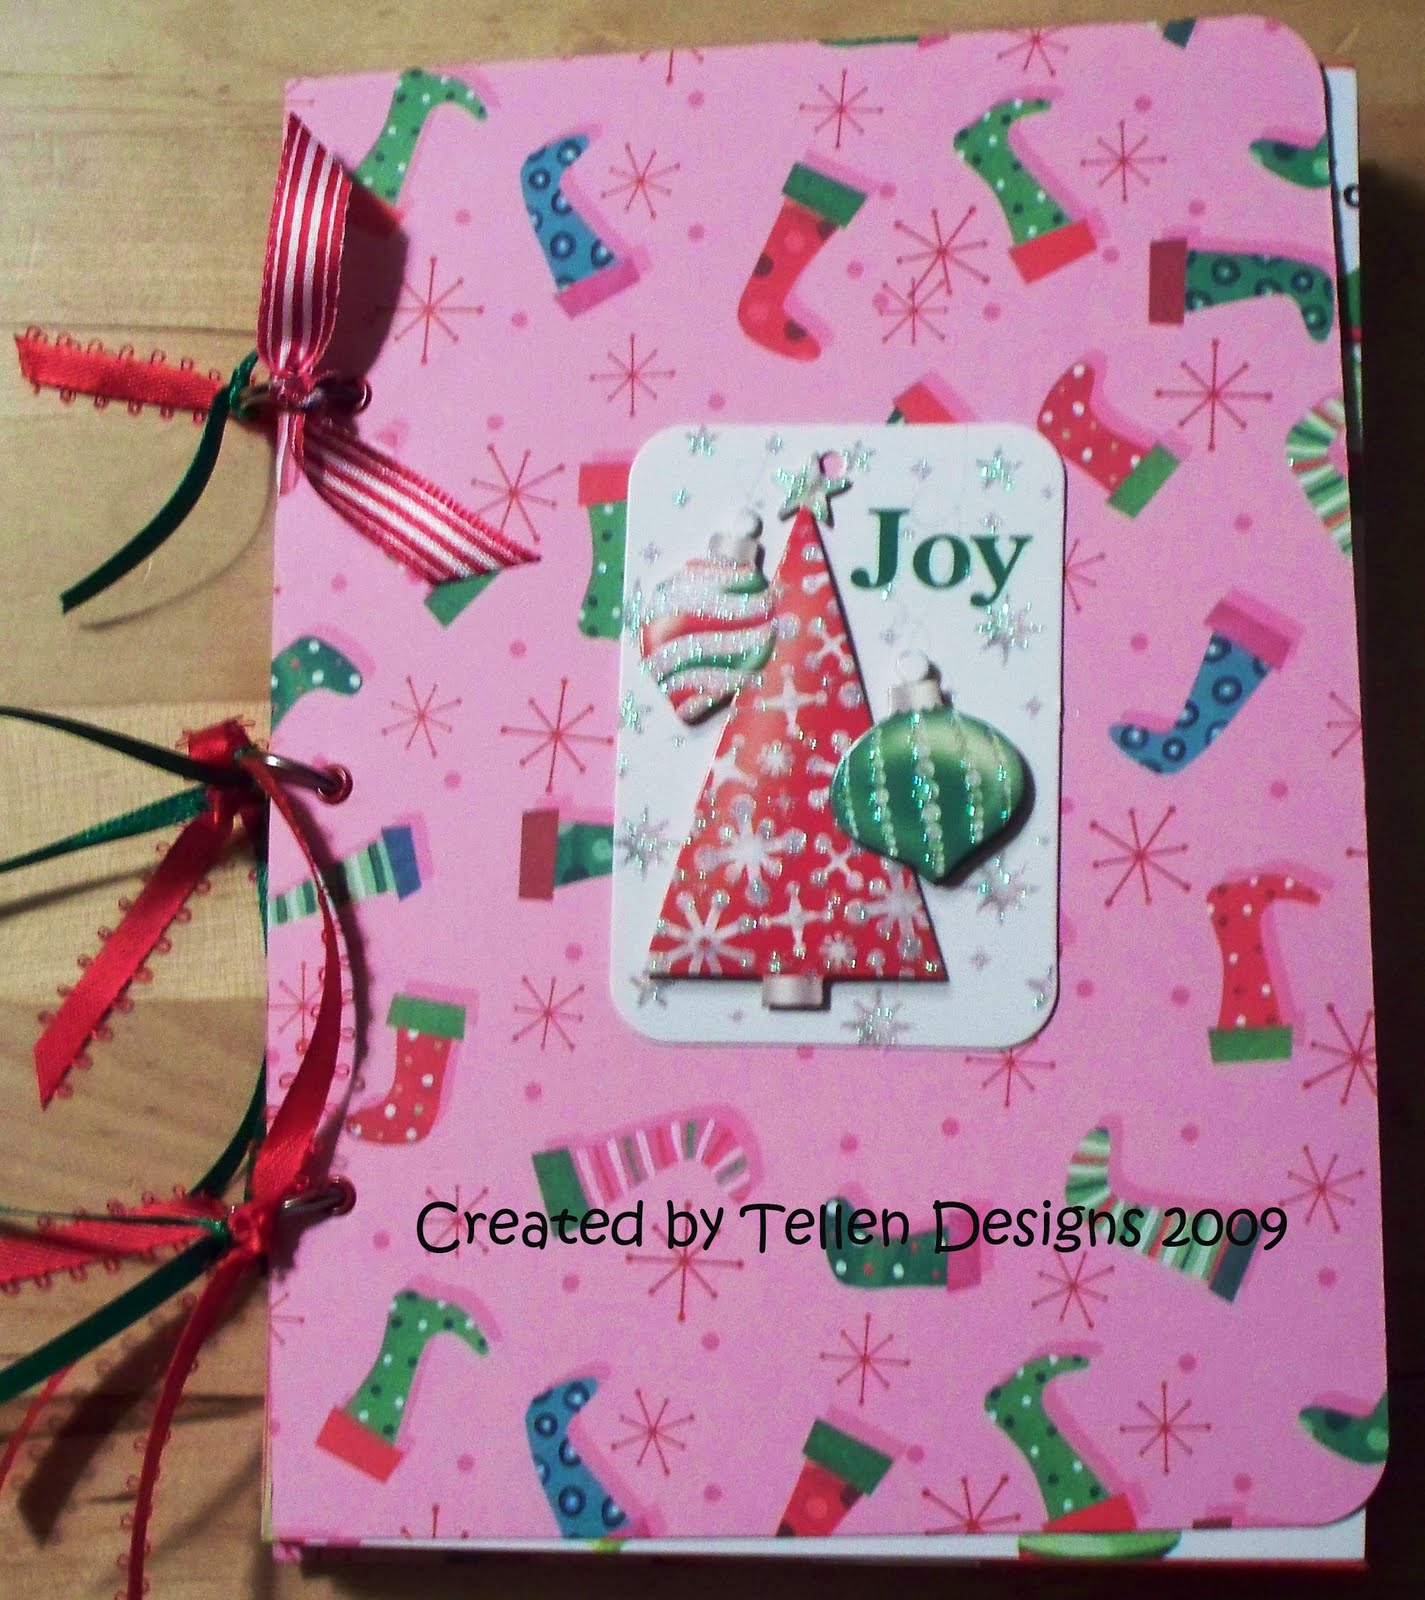
For the covers, I cut out patterned designer paper (DCWV - Taj Mahal) - one for the front and one for the back.

On the flap, I adhered die cuts. This is a perfect place for die-cuts or rub-ons. In the video, she actually does some embossing.

I wanted to keep it simple because I wasn't sure if the person I'm giving it to is frilly though she seems to be a clean cut kind of girl. She went to Morocco to meet a guy who happens to be a friend of my husband's. I'll put photos of her and him that they sent us on these pages.

The tag insert has a patterned front to adhere more photos and a plain back for journaling.

For this mini album, I only used 4 envelopes (approximately 7x5"). I wanted to keep it small and simple so that she could take it to work and show her friends photo from the trip.

I actually made a Christmas one first.

I didn't do anything special to the tags, as you can see. Just a place to put photos and on the other side, there's a blank space for journaling.

Lessons learned: Make sure your eyelets match the holes made by your eyelet maker. I used Making Memories and didn't check to see which was being used and the holes were bigger than the eyelet and they sort of kept coming apart once I put the rings in.

These are actual Christmas gift tags I found at Michael's and were only $1.49 whereas the other die cuts usually cost around $4.99 for this quality. I removed the string and just adhered it to the flaps.

Overall, I really like these envelope mini albums. I plan to make more but will make sure holes, eyelets and rings work prior to putting it all together. ;P

We'd love to have you become a follower and take our blinkie to your blog and tell others about this wonderful blog; especially ways to save and make gifts for those you love.

Happy crafting!